
Steps to Install Oracle Database 12c Release 2 in Redhat Linux 7.5
In this Guide we will see on How to Install the Oracle Database 12c Release 2 in Redhat Enterprise Linux 7.5 Server.
To Download the Oracle Database Installer, Visit the below URL:
http://www.oracle.com/technetwork/database/enterprise-edition/downloads/index.html
Prerequiste for Installation:
- Download the Oracle Database 12c installer package.
- The Swap Space size should be 16GB .
- Enable X11 Forwarding to “yes” in sshd configuration file.
- Properly set the hostname.
- Set the Kernel Parameters.
- Set the ulimit values.
- Install the required rpm packages.
1] OS Release
[stextbox id=”Default” mode=”css” bwidth=”7″ color=”FFFFFF” ccolor=”000000″ bcolor=”1A52EA” bgcolor=”000000″ bgcolorto=”000000″ image=”null”]
[root@quickfixlinux ~]# cat /etc/redhat-release
Red Hat Enterprise Linux Server release 7.5 (Maipo) [/stextbox]
1.1] Set the Hostname :
(a) Under /etc/hosts:
192.168.xx.xx quickfixlinux.com
(b) Under /etc/hostname:
quickfixlinux.com
1.2] Set the SELINUX to “Permissive”
[root@quickfixlinux ~]#getenforce
Enforcing
[root@quickfixlinux ~]# setenforce 0
[root@quickfixlinux ~]# getenforce
Permissive
1.3] Install the required rpm packages:
[root@quickfixlinux ~]# yum install -y binutils compat-libstdc++-33 compat-libstdc++-33.i686 gcc gcc-c++ glibc glibc.i686 glibc-devel glibc-devel.i686 ksh libgcc libgcc.i686 libstdc++ libstdc++.i686 libstdc++-devel libstdc++-devel.i686 libaio libaio.i686 libaio-devel libaio-devel.i686 libXext libXext.i686 libXtst libXtst.i686 libX11 libX11.i686 libXau libXau.i686 libxcb libxcb.i686 libXi libXi.i686 make sysstat unixODBC unixODBC-devel zlib-devel
1.4] Set the limits for Oracle user in /etc/security/limits.conf file :
oracle soft nproc 131072
oracle hard nproc 131072
oracle soft nofile 131072
oracle hard nofile 131072
oracle soft core unlimited
oracle hard core unlimited
oracle soft memlock 50000000
oracle hard memlock 50000000
1.5] Set the Kernel Parameters:
[root@quickfixlinux ~]# /sbin/sysctl -w kernel.sem=”250 32000 100 128″
kernel.sem = 250 32000 100 128
[root@quickfixlinux ~]# /sbin/sysctl -w fs.aio-max-nr=1048576
fs.aio-max-nr = 1048576
[root@quickfixlinux ~]# /sbin/sysctl -w kernel.shmmax=4398046511104
kernel.shmmax = 4398046511104
[root@quickfixlinux ~]# /sbin/sysctl -w kernel.shmall=1073741824
kernel.shmall = 1073741824
[root@quickfixlinux ~]# /sbin/sysctl -w net.core.wmem_max=1048586
net.core.wmem_max = 1048586
[root@quickfixlinux ~]# /sbin/sysctl -w net.core.wmem_default=262144
net.core.wmem_default = 262144
[root@quickfixlinux ~]# /sbin/sysctl -w net.core.rmem_max=4194304
net.core.rmem_max = 4194304
[root@quickfixlinux ~]#/sbin/sysctl -w net.core.rmem_default=262144
net.core.rmem_default = 262144
[root@quickfixlinux ~]# /sbin/sysctl -w net.ipv4.ip_local_port_range=”9000 65500″
net.ipv4.ip_local_port_range = 9000 65500
[root@quickfixlinux ~]# /sbin/sysctl -w kernel.shmmni=4096
kernel.shmmni = 4096
[root@quickfixlinux ~]# /sbin/sysctl -w kernel.shmmax=8329226240
kernel.shmmax = 8329226240
[root@quickfixlinux ~]# sysctl -p
[root@quickfixlinux ~]#sysctl -a
1.6] Set the DISPLAY Environment:
Now, as a root user:
(a) Make sure you have “Tick” the Enable X11 forwarding in PUTTY.
(b) Launch the “Xming” application from your local machine.
(c) touch /root/.Xauthority
(d) uncomment the X11Forwarding and set to “yes” in /etc/ssh/sshd_config file.
(e) [root@quickfixlinux ~]# xauth list $DISPLAY
localhost.localdomain/unix:10 MIT-MAGIC-COOKIE-1 3a49e090537be8161b19526143ff2988
(f)[root@quickfixlinux ~]# echo $DISPLAY
[ IF the output shows nothing, set the display env first… ]
(e)[root@quickfixlinux ~]# export DISPLAY= localhost:10.0
[root@quickfixlinux ~]# echo $DISPLAY
localhost:10.0
Now, as a oracle user:
(a) [oracle@quickfixlinux ~]$ touch .Xauthority
(b) [oracle@quickfixlinux ~]$ xauth list $DISPLAY
(c) [oracle@quickfixlinux ~]$ echo $DISPLAY
[ Both the xauth list and DISPLAY shows NO output, Whereas, we need to add it now. ]
(d) [oracle@quickfixlinux ~]$ xauth add localhost.localdomain/unix:10 MIT-MAGIC-COOKIE-1 3a49e090537be8161b19526143ff2988
[Add the root MIT-MAGIC-COOKIE in oracle user ]
(e) [oracle@quickfixlinux ~]$export DISPLAY= localhost:10.0
Now, try to issue the command “xclock” and wait for it launch.
2] Create user and groups:
[root@quickfixlinux ~]# useradd oracle
[root@quickfixlinux ~]# password oracle
[root@quickfixlinux ~]#groupadd oinstall
[root@quickfixlinux ~]#usermod -G oinstall oracle
2.2] Create the folders:
[root@quickfixlinux ~]# mkdir /oracle
[root@quickfixlinux ~]# chown -R oracle:oinstall /oracle
[root@quickfixlinux ~]# chmod -R 775 /oracle
[root@quickfixlinux ~]# chmod g+s /oracle
If you didn’t set the above kernel parameters for ulimit values, you will be encountering errors while installation as below :
Lets get into the Oracle 12c database Installation now:
As a oracle user, get into the respective path to install :
[oracle@quickfixlinux ~]$ cd /database/
[oracle@quickfixlinux database]$ ./runInstaller
Starting Oracle Universal Installer…
Checking Temp space: must be greater than 500 MB. Actual 393933 MB Passed
Checking swap space: must be greater than 150 MB. Actual 51199 MB Passed
Checking monitor: must be configured to display at least 256 colors. Actual 16777216 Passed
Preparing to launch Oracle Universal Installer from /tmp/OraInstall2018-04-25_11-03-07PM. Please wait …
[oracle@quickfixlinux database]$
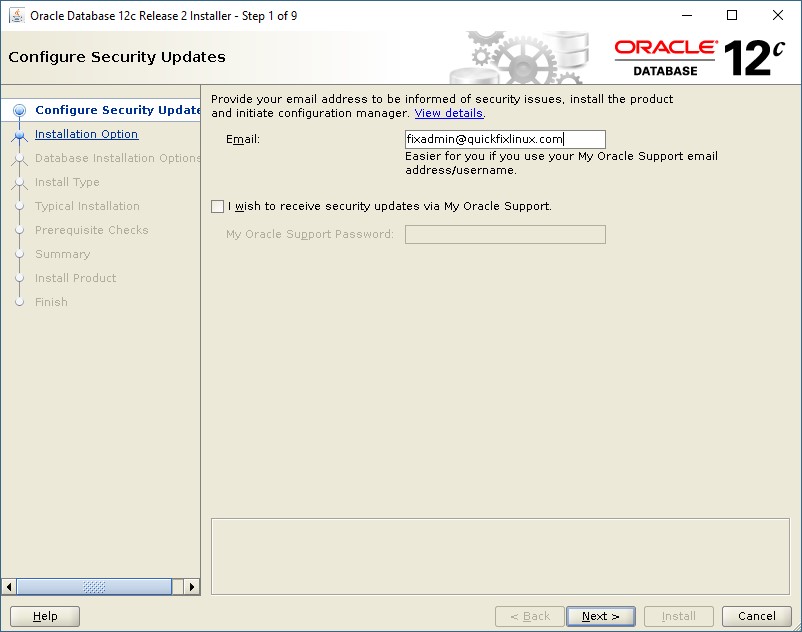
[STEP-1]


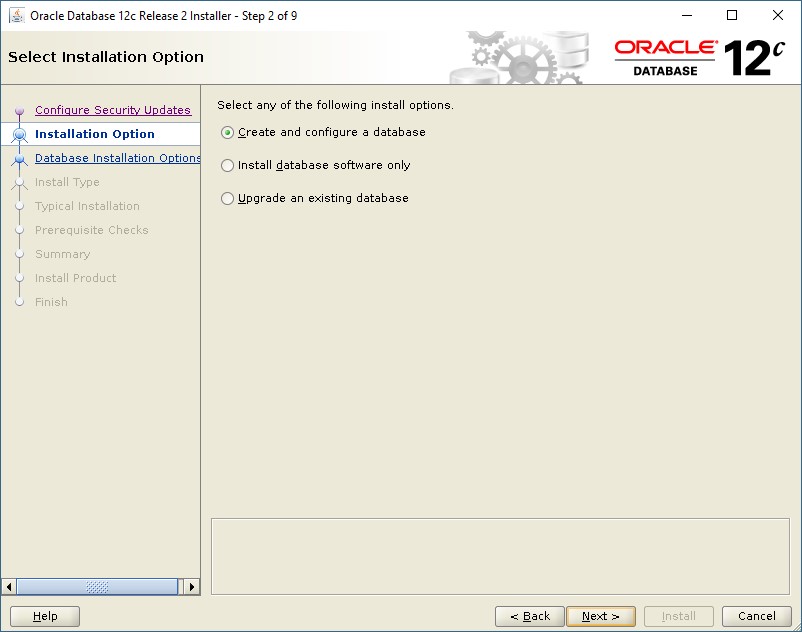
[STEP-2]
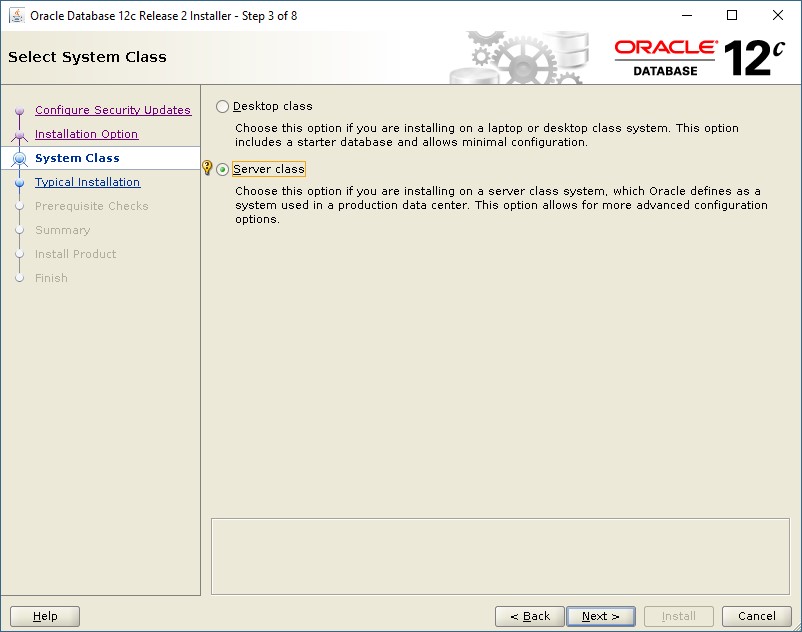
[STEP-3]
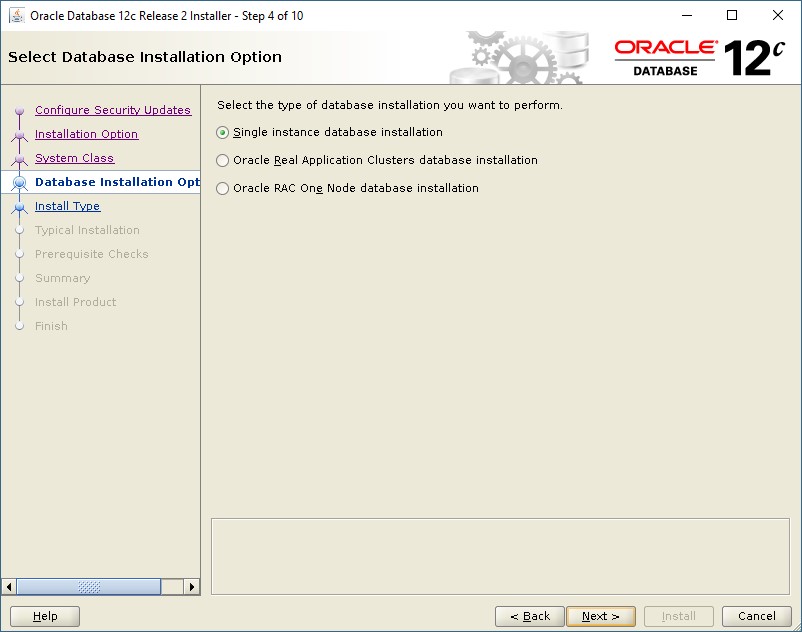
[STEP-4]
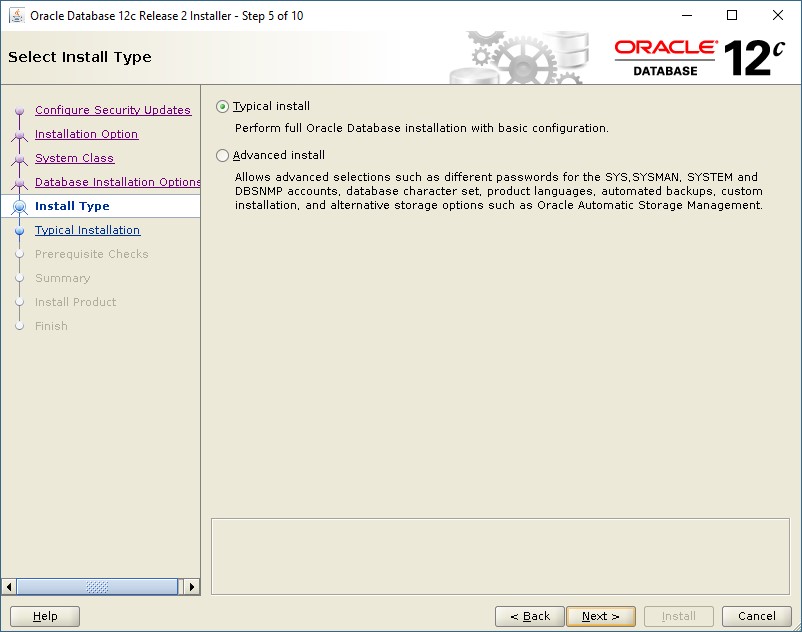
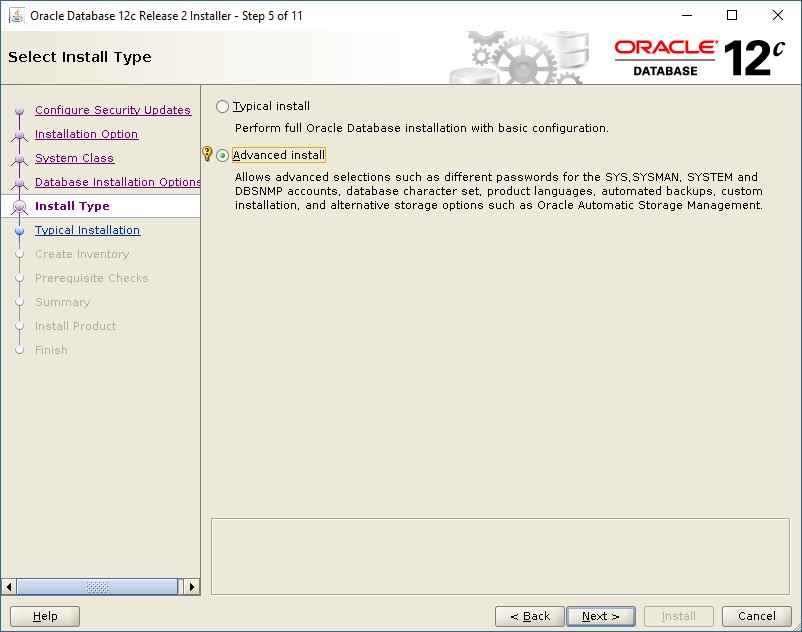
[STEP-5] There are two ways to do the installation, (1) Typical Install or (2) Advanced Install.. Here, first we will look into (1) & then (2)
[STEP-6]
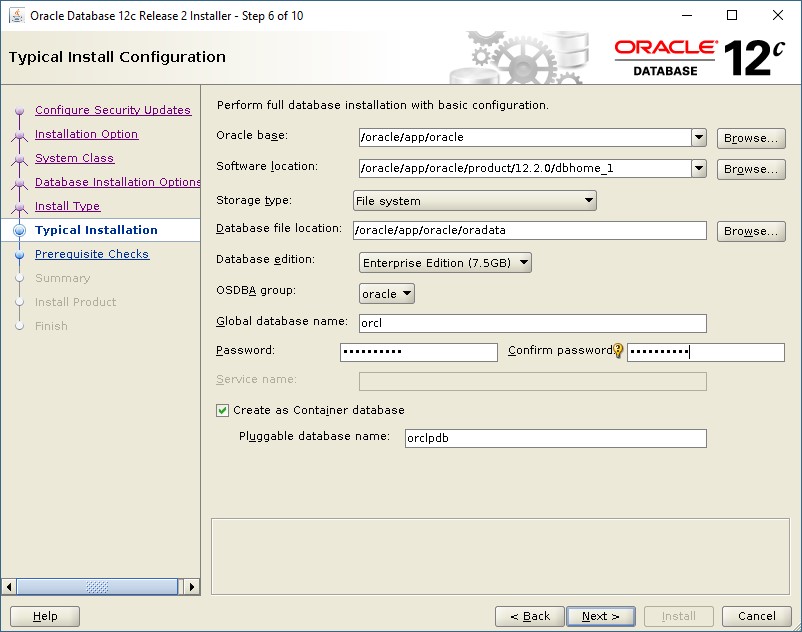
NOTE: password here can’t contain any special characters:
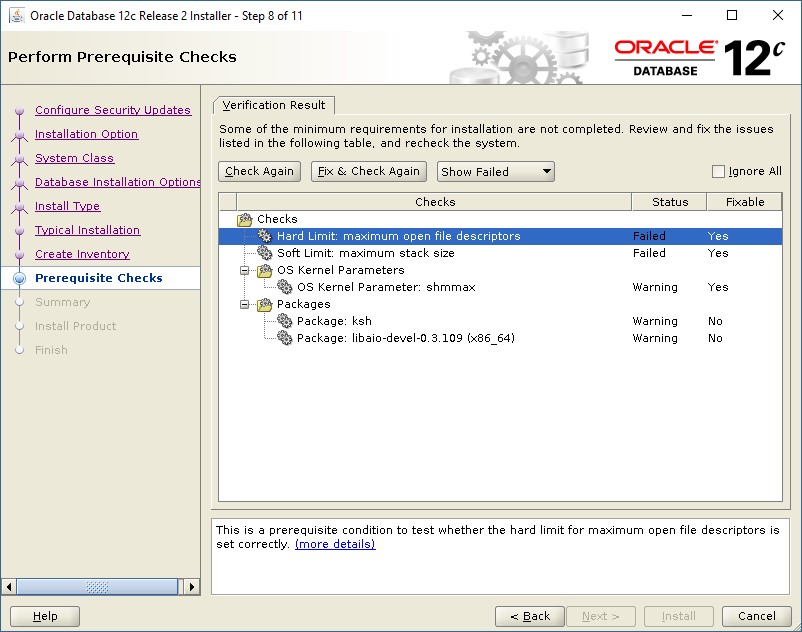
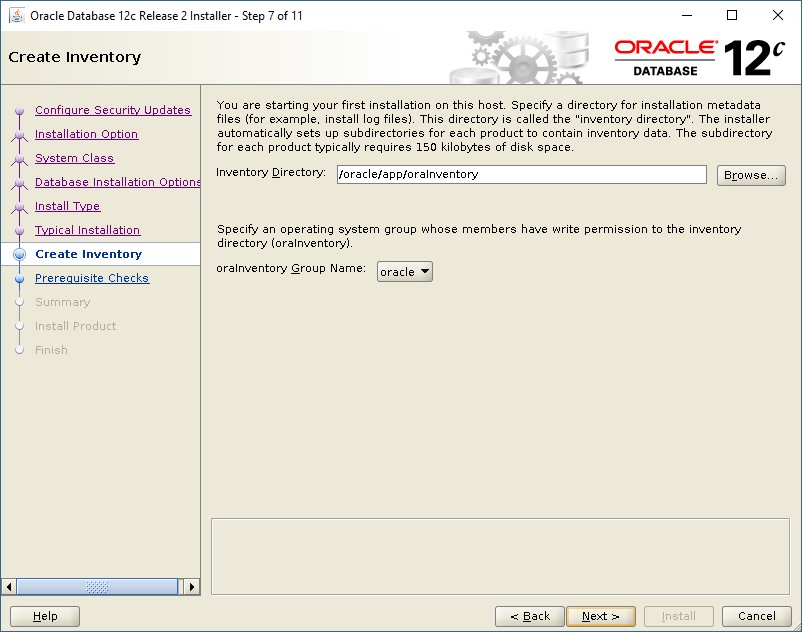
[STEP-7]
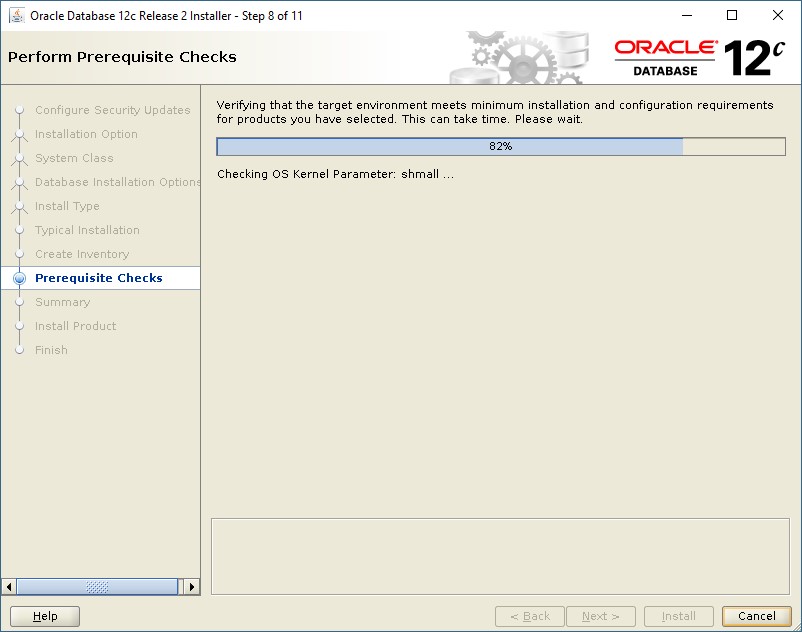
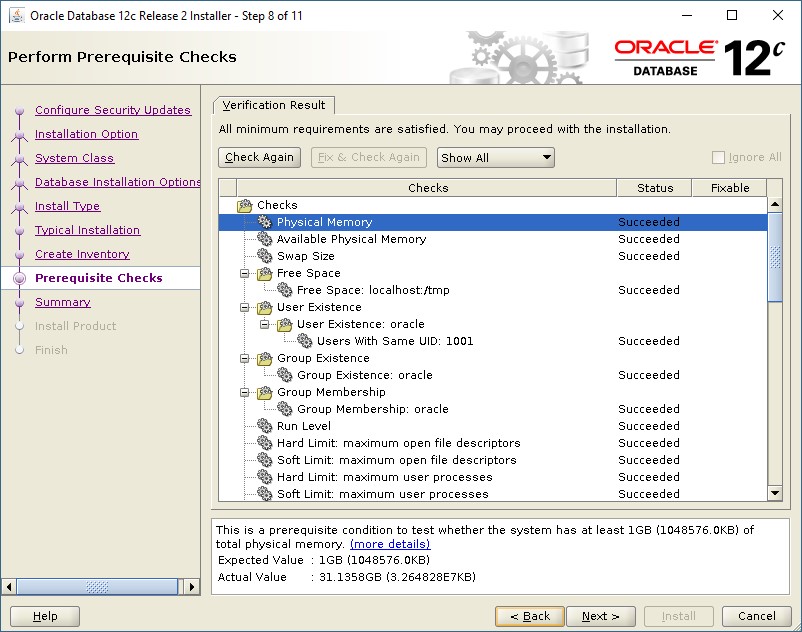
[STEP-8]
[STEP -5 – Advanced] Now, we will look on the Advanced Install options:
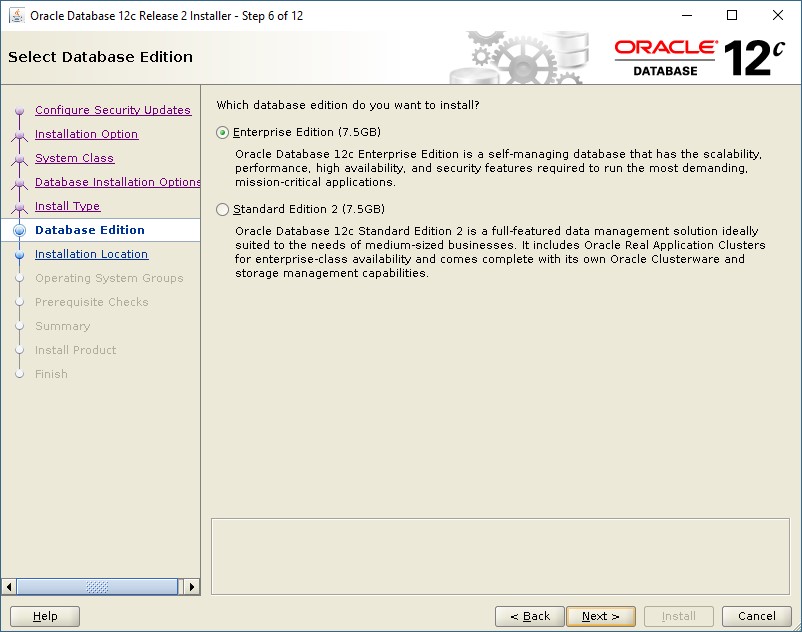
[STEP -6 – Advanced]
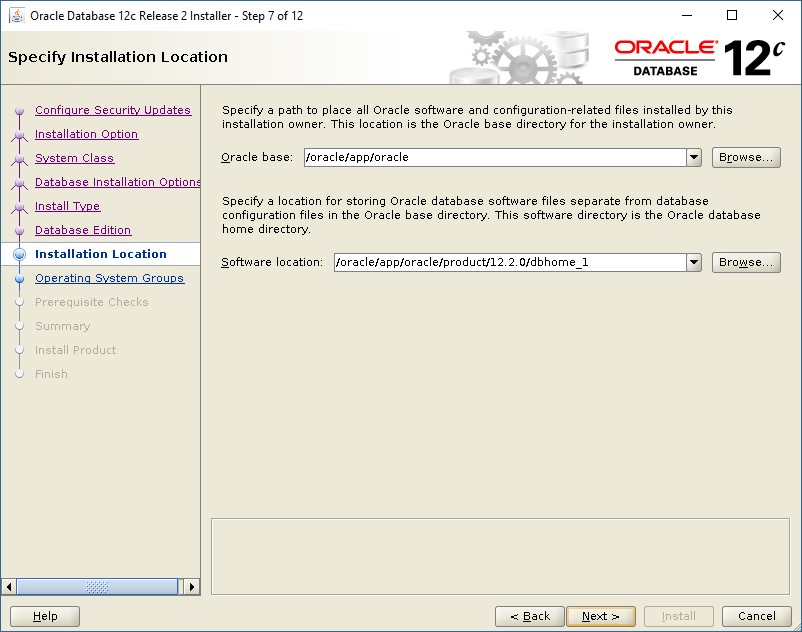
[STEP -7 – Advanced]
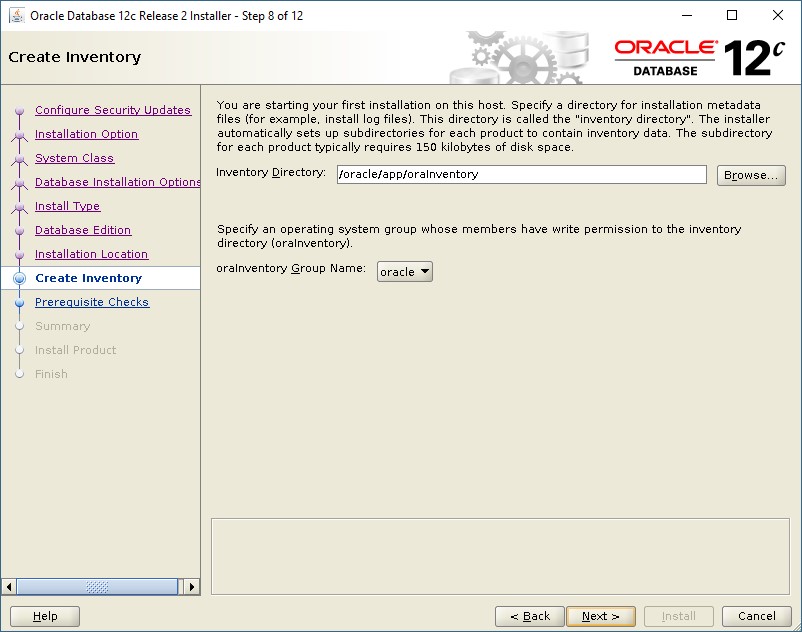
[STEP -8 – Advanced]
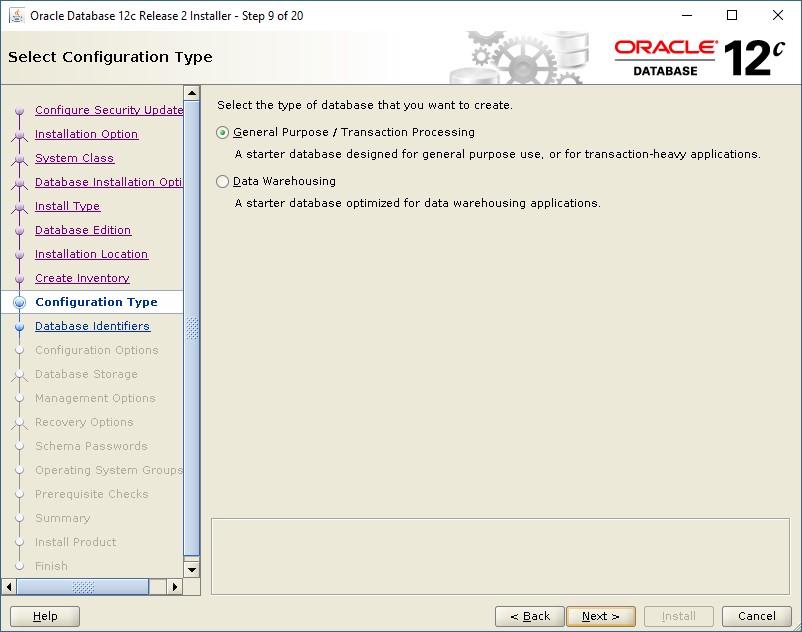
[STEP -9 – Advanced]
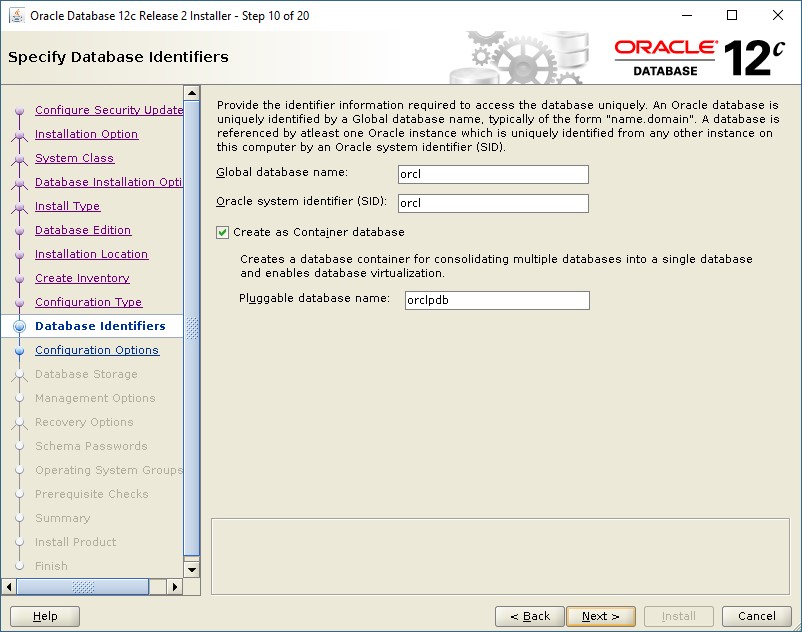
[STEP -10 – Advanced]
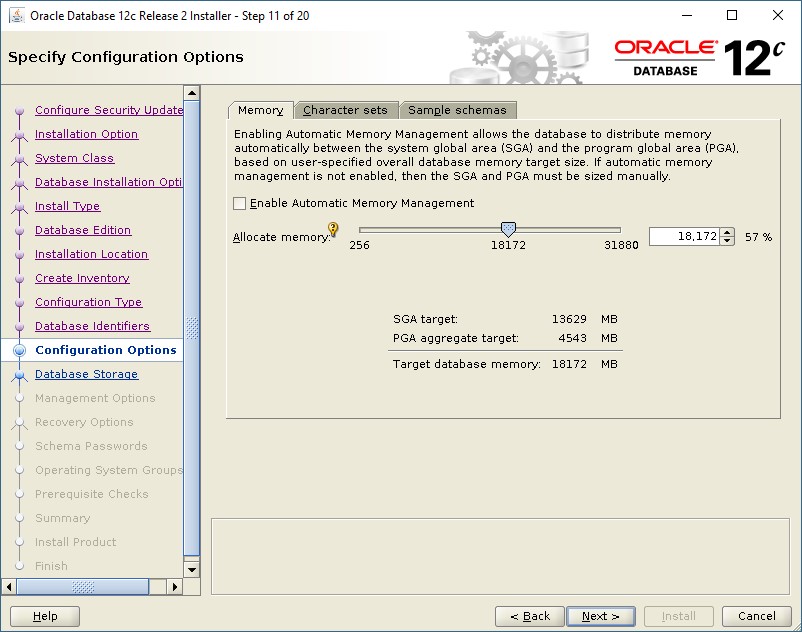
[STEP -11 – Advanced]
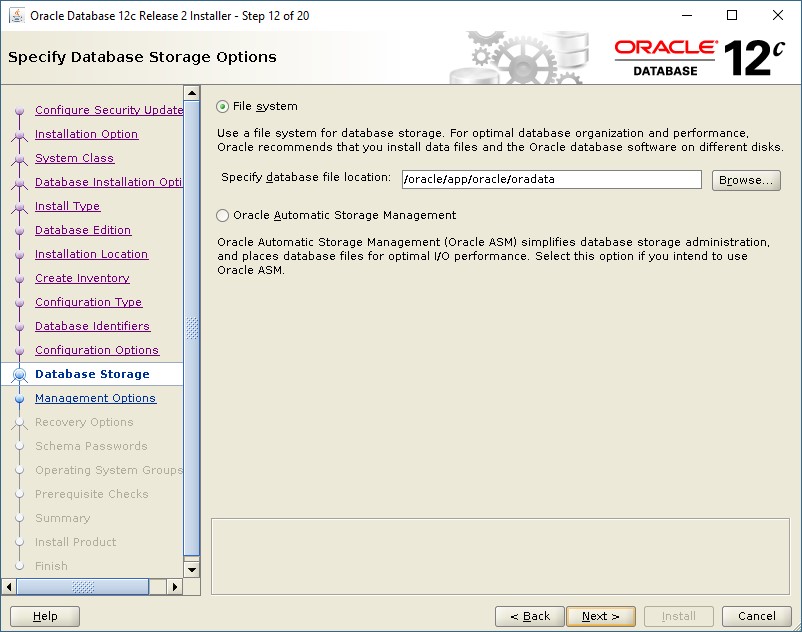
[STEP -12 – Advanced]
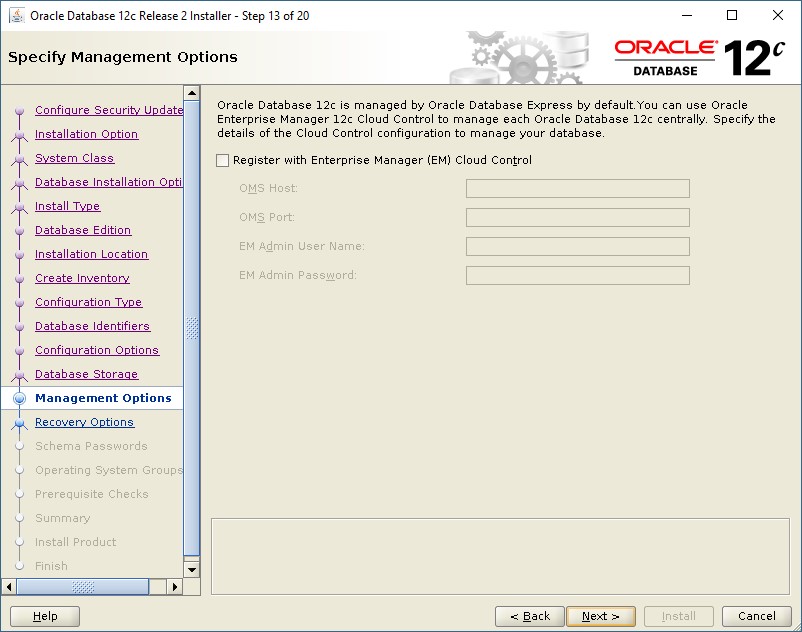
[STEP -13 – Advanced]
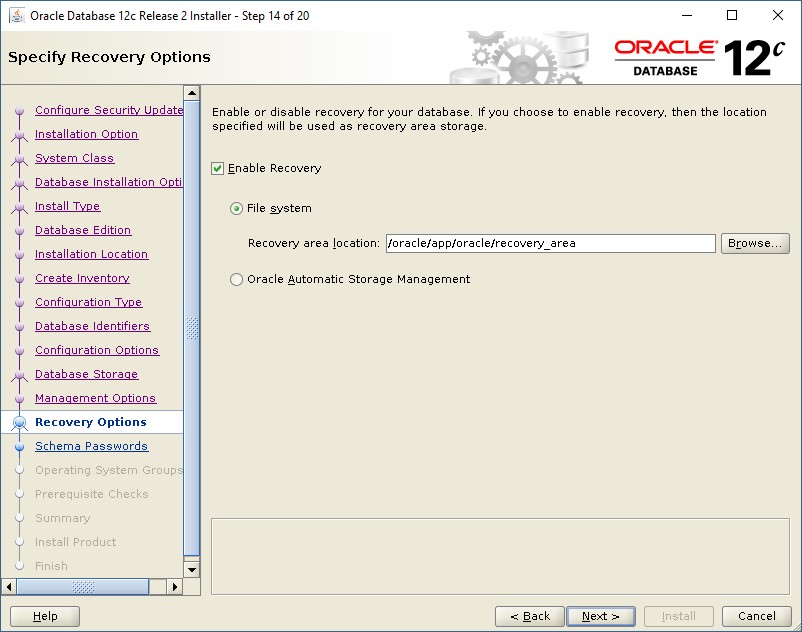
[STEP -14 – Advanced]
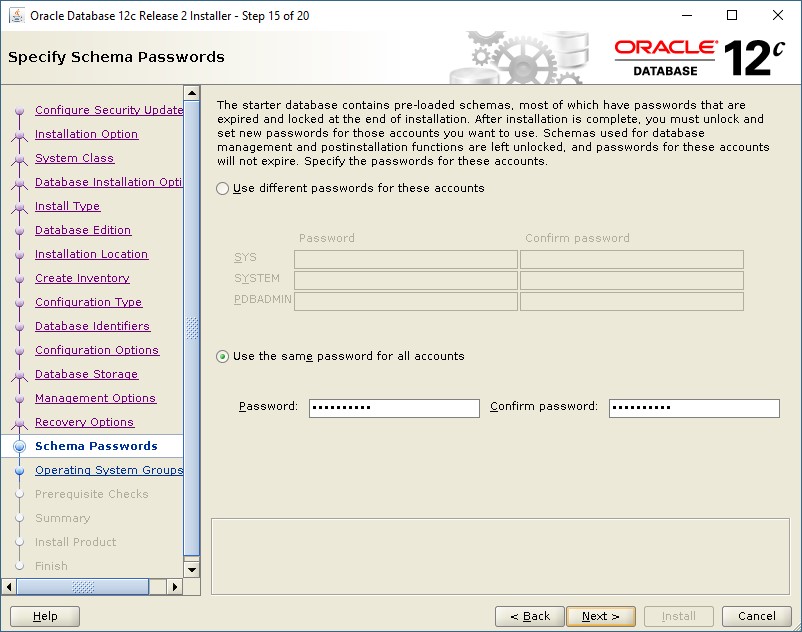
[STEP -15 – Advanced]
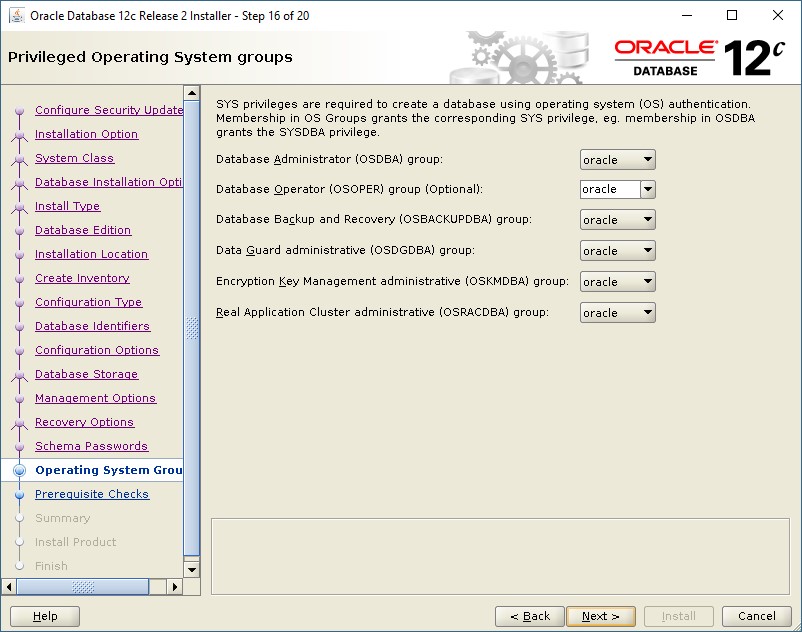
[STEP -16 – Advanced]
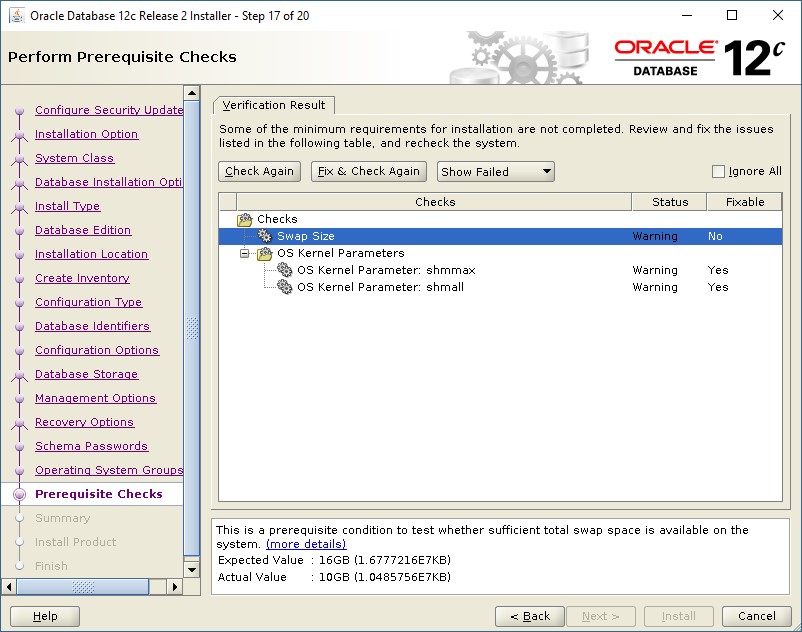
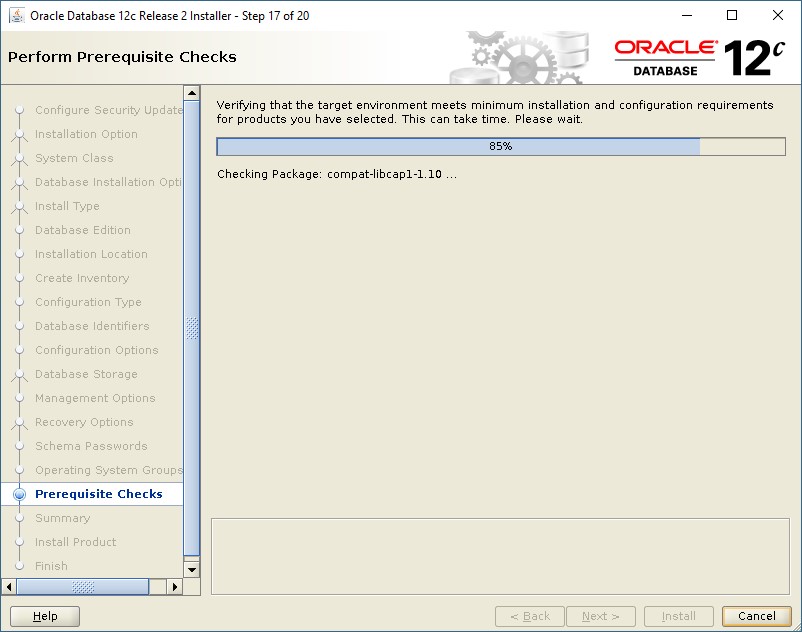
[STEP -17 – Advanced]
[STEP -18 – Advanced]

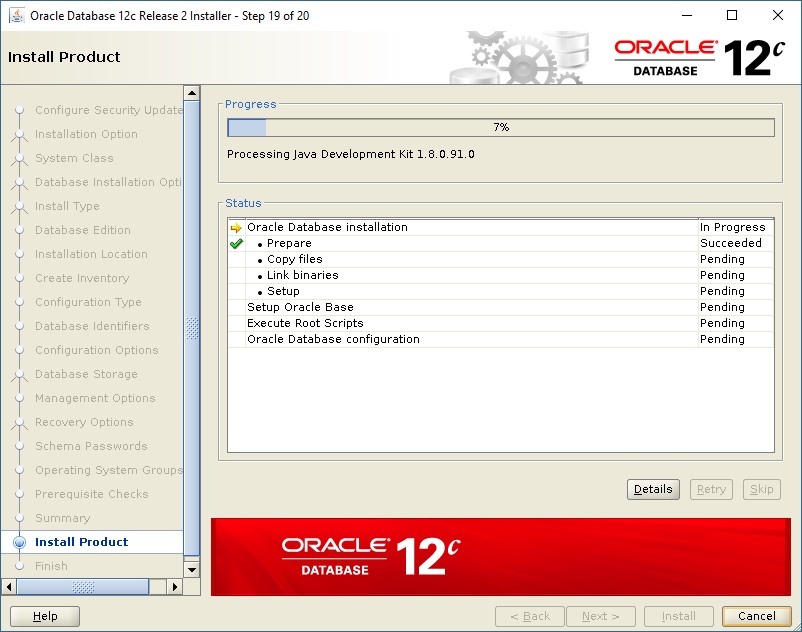
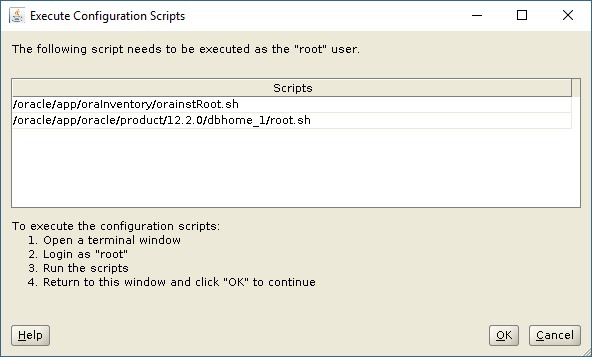
[STEP -19 – Advanced]
[STEP -20 – Advanced]
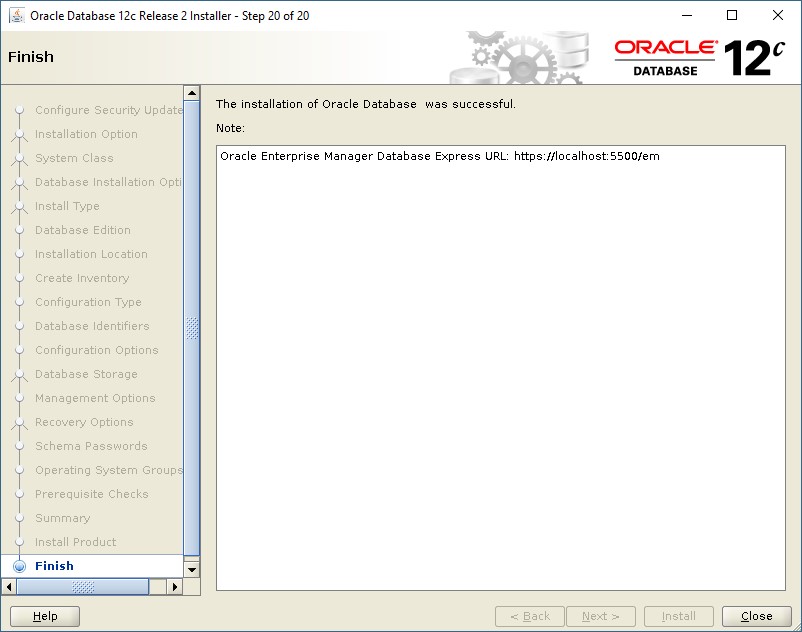
As a root user: Now, Change the /etc/oratab entry from “N” to “Y”
orcl:/oracle/app/oracle/product/12.2.0/dbhome_1:Y
As a Oracle user: Now, add the below Entries in .bash_profile file :
export ORACLE_HOSTNAME=quickfixlinux
export ORACLE_UNQNAME=orcl
export ORACLE_BASE=/u01/app/oracle
export ORACLE_HOME=$ORACLE_BASE/product/12.1.0/db_1
export ORACLE_SID=orcl
[oracle@quickfixlinux ~]$ source .bash_profile
[oracle@quickfixlinux ~]$ ./sqlplus
SQL*Plus: Release 12.2.0.1.0 Production on Thu Apr 26 01:46:19 2018
Copyright (c) 1982, 2016, Oracle. All rights reserved.
Enter user-name: SYS AS SYSDBA
Enter password: <password given while installation>
Connected to an idle instance.
To start the oracle LISTENER:
[oracle@quickfixlinux ~]$ lsnrctl status
LSNRCTL for Linux: Version 12.2.0.1.0 – Production on 03-MAY-2018 02:27:22
Copyright (c) 1991, 2016, Oracle. All rights reserved.
Connecting to (DESCRIPTION=(ADDRESS=(PROTOCOL=TCP)(HOST=192.168.21.1)(PORT=1521)))
STATUS of the LISTENER
————————
Alias LISTENER
Version TNSLSNR for Linux: Version 12.2.0.1.0 – Production
Start Date 28-APR-2018 01:27:22
Uptime 5 days 0 hr. 59 min. 59 sec
Trace Level off
Security ON: Local OS Authentication
SNMP OFF
Listener Parameter File /oracle/app/oracle/product/12.2.0/dbhome_1/network/admin/listener.ora
Listener Log File /oracle/app/oracle/diag/tnslsnr/test123/listener/alert/log.xml
Listening Endpoints Summary…
(DESCRIPTION=(ADDRESS=(PROTOCOL=tcp)(HOST=192.168.21.1)(PORT=1521)))
(DESCRIPTION=(ADDRESS=(PROTOCOL=ipc)(KEY=EXTPROCORCL)))
The listener supports no services
The command completed successfully
Resolution:
Edit the listener.ora file and change the HOST from IP ADDRESS to server hostname …
[oracle@quickfixlinux ~]$ vim /oracle/app/oracle/product/12.2.0/dbhome_1/network/admin/listener.ora